

Three steps: 1. Create your account. 2. Run the setup script. 3. Get going on your project.Please do steps 1 and 2 before the day, so you find out early if anything needs fixing. A mentor will be on the floor to help (we’ll be in the red shirts).
Step 1. Create your account
- Find the invite email for NCSEA Hackathon on Connections Hub. Accept it and log in once. The links your calculations return only open after you’ve joined (check spam if you can’t find it).
- That email also contains your API key - which you will need in step 2.
Step 2. Run the setup script
The installer finds the AI apps on your laptop, saves your key and connects each app to Connections Hub. It backs up each app’s settings file before changing it. Download: connections-hub-installer.zip- Windows
- Mac
-
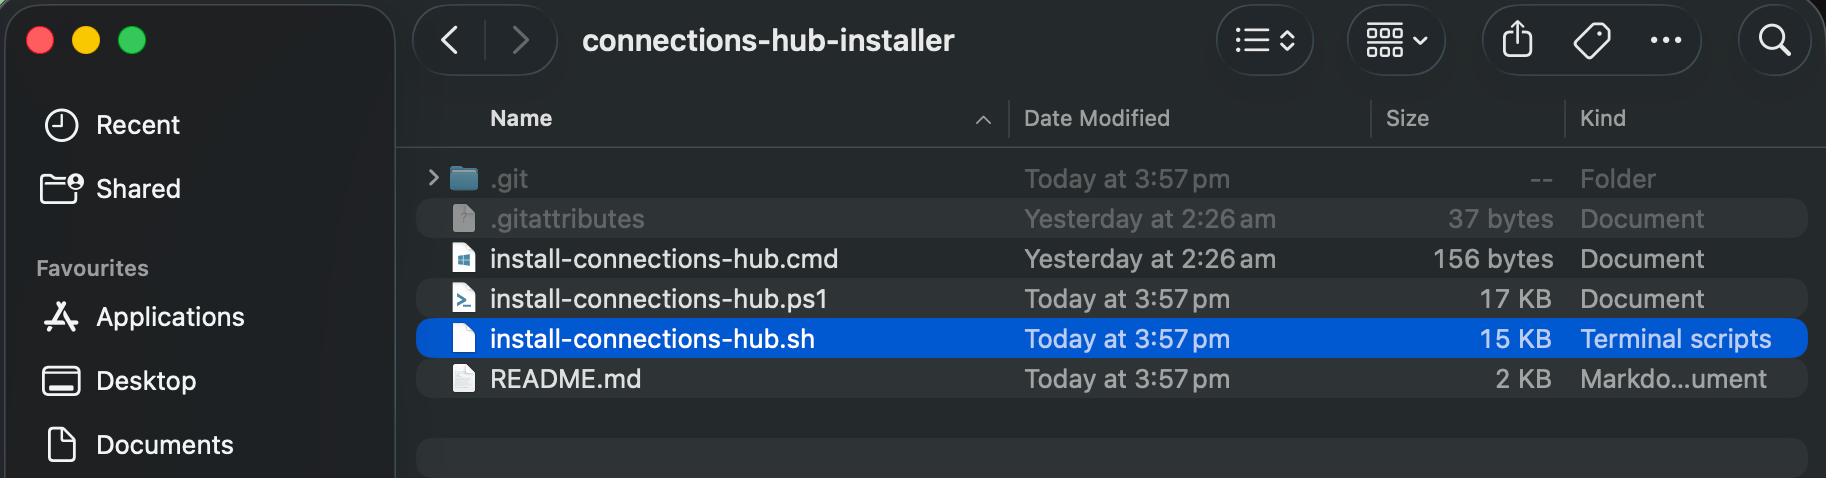
In Downloads, right-click
connections-hub-installer.zip, choose Extract All, then Extract. Don’t run anything from inside the zip. - Copy your API key from the email.
-
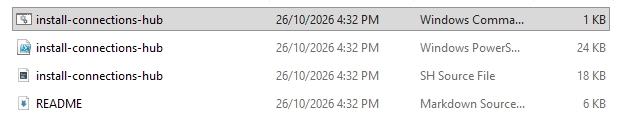
Double-click install-connections-hub with the gear icon (Type: Windows Command Script), not the other files with the same name.
-
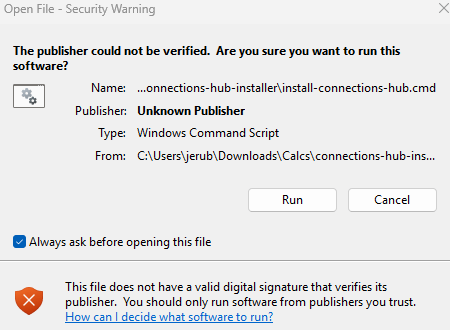
If Windows says “The publisher could not be verified”, click Run. If it says “Windows protected your PC”, click More info, then Run anyway.
-
Paste your key (right-click pastes; you’ll see
*as it goes in) and press Enter. If Claude Desktop is open, the installer asks to close it: press Enter. It reopens Claude when it’s done.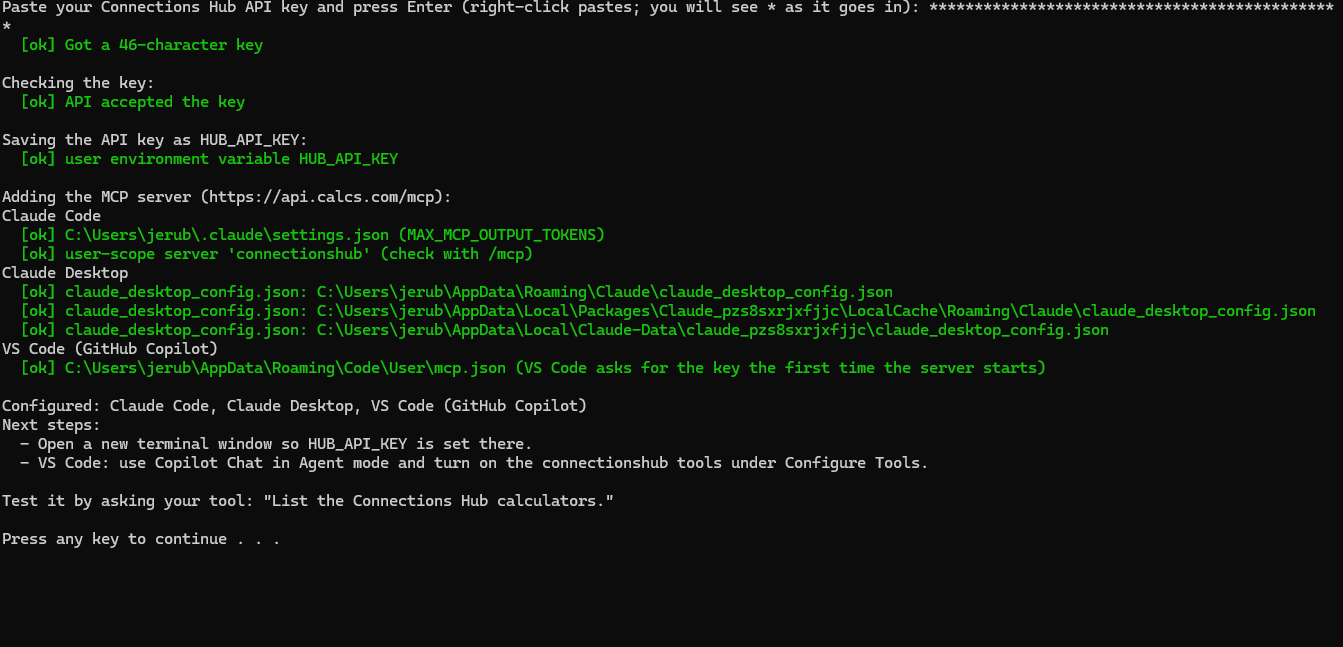
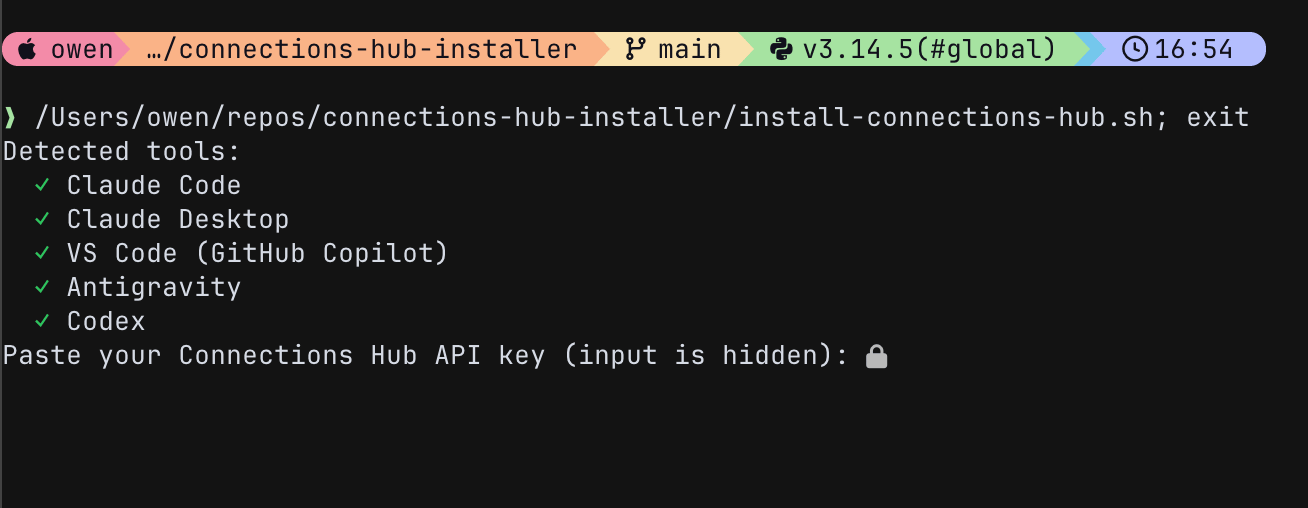
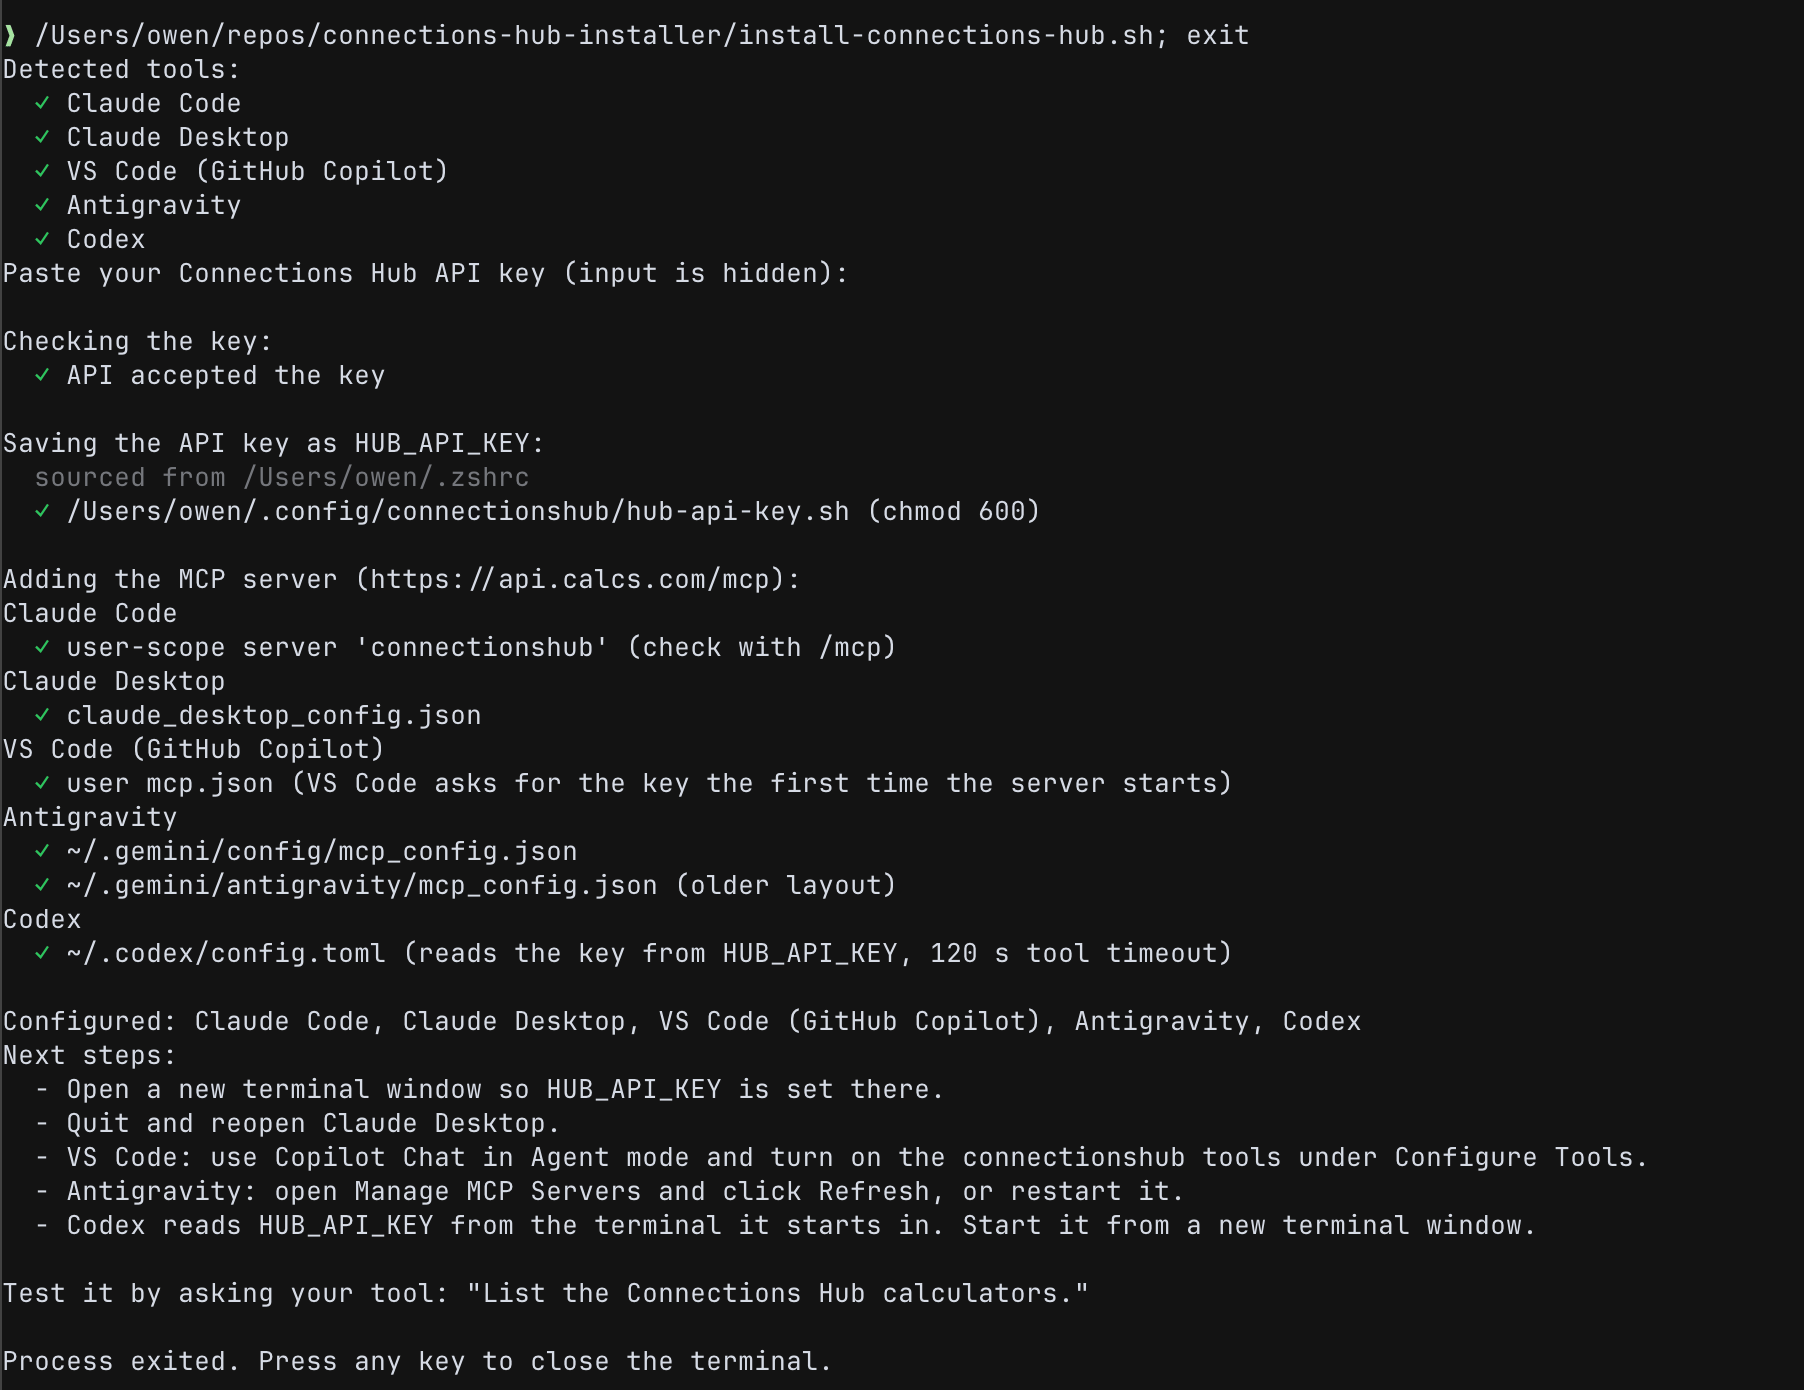
Check your app is connected
Check your app is connected
- Claude Desktop: the installer reopens it. In Settings → Developer, connectionshub should say Running.
- VS Code: open Copilot Chat, choose Agent, click the tools icon, tick connectionshub, and paste your key when VS Code asks.
- Cursor: Cursor Settings → MCP (Tools & MCP in newer versions) → switch connectionshub on.
- Antigravity: open MCP Servers and click Refresh.
- Your app isn’t listed: open it once, close it, rerun the installer.
- Needs attention next to an app you use: set it up by hand (below). Next to one you don’t use: ignore it.
Installer problems
Installer problems
- Windows
- Mac
PowerShell line (open PowerShell in the extracted folder and replace
YOUR_API_KEY with your key):Set it up by hand (only if the installer can't)
For example, if your company blocks scripts.
Set it up by hand (only if the installer can't)
For example, if your company blocks scripts.
Claude Desktop (needs Node.js 22 or newer): Settings → Developer → Edit Config. A folder opens: right-click VS Code (GitHub Copilot): Command Palette (Ctrl+Shift+P / Cmd+Shift+P), then MCP: Open User Configuration, paste this and save. Then in Copilot Chat choose Agent, open the tools menu, tick connectionshub and paste your key when asked.Cursor: Settings → MCP → Add new MCP server. Paste this with your key in place of Antigravity and Windsurf (Devin Desktop): open the raw MCP config from the app’s MCP servers panel (“View raw config”), paste this with your key, save, then click Refresh. Windsurf is not tested by us and needs a paid Devin plan. Use its Local mode.Claude Code (store your key first: see “Scripts and code” below). Windows PowerShell:Mac Terminal:Then run Sign in with your ChatGPT account, then type
claude_desktop_config.json, choose Open with, then Notepad (Mac: TextEdit). If it’s empty or only {}, replace everything with the block below. Otherwise paste the file and this block into Claude and ask “Merge these into one valid JSON file.” Keep Bearer and its space, and write Authorization:${HUB_AUTH} exactly. Save, quit Claude Desktop completely (Windows: right-click the Claude icon by the clock, then Quit; Mac: Cmd+Q) and reopen it.paste-your-key-here, save, then switch connectionshub on (new servers start disabled). Put the key in the file itself: Cursor opened from the Dock or Start menu can’t see a key stored in your terminal.claude and type /mcp: you should see connectionshub: connected. Ran the add line before storing the key or opening a new window? Claude Code saved an empty key: run claude mcp remove connectionshub, then add it again.Codex CLI (store your key first):/mcp: connectionshub: connected.More detail on each app, the 13 tools, and timeouts: MCP server.Step 3. Get going on your project
Paste this into your AI:- Verdict:
pass,fail,errorornot_evaluated. - Governing check and its utilization (1.0 or less passes).
- Links to the calculation and the project. Open them in Connections Hub.
Ideas to build
Ideas to build
- HSS connection optimization: set your own loads, then try five column sizes and pick the lightest that passes.
- HSS truss designer
- HSS education tool
- From a spreadsheet: read connections from a CSV, run each one, write a summary table with verdicts and links.
- Calc pack: run a set of connections and export the project as one PDF.
- Explain it: ask your AI why a check governs and what to change.
Good to know
Good to know
- Units: send values with their unit, like
"24 ft"or"100 kip". The API converts them and tells you straight away if a unit doesn’t fit that input. - Start from a preset and change one or two inputs at a time. If you get
error, go back to the preset and change one thing. - Timing: about 15 s per calculation, 30 to 40 s for truss connections. 20 options one after another is about 5 minutes; plan bigger loops around that.
- Deleting is switched off for hackathon keys. Ask a mentor if you need something removed.
- Errors: 422 means an input wasn’t accepted (the message names the input and what to send, often a unit or an option). Verdict
errormeans the calculator couldn’t evaluate that design: go back to the preset and change one input at a time. 403 “Deletes are disabled” is expected. 500 or a timeout: try once more, then show a mentor the error.
Scripts and code (API)
Scripts and code (API)
Your AI writes a script (Python is easiest) that calls the API with your key. Full reference: API docs. Good for loops, spreadsheets and batch runs. You need Python installed and somewhere to run the script: a terminal, or an AI app that runs code for you (VS Code, Cursor, Antigravity, Claude Code).
Test it. Windows (PowerShell): type Mac:You should see two calculators and Then change the Task line to what you want to build.
No installer? Store your key by hand
No installer? Store your key by hand
Windows (PowerShell: press the Windows key, type PowerShell, press Enter; no admin needed):Mac (Terminal):Now close this window and open a new one. Your key only works in windows opened after you store it (Mac: or run
source ~/.zshrc).curl.exe, not curl:"total".Your first script. Give your AI this:Your own web app (API)
Your own web app (API)
A web page can’t call
api.calcs.com directly, so put a small server between your page and the API. Your AI can build it: do this in VS Code, Cursor, Antigravity or Claude Code (they create and start it for you). Your key is already saved as HUB_API_KEY by the installer (no installer? see “Scripts and code” above), so just paste this and describe your app on the last line.- Putting it online (Vercel, Netlify, Lovable)? Make the API calls from a serverless function and put the key in the host’s environment settings, never in the page.
- Claude artifacts and other in-chat previews can’t call the API live. They can show results your AI has already fetched.